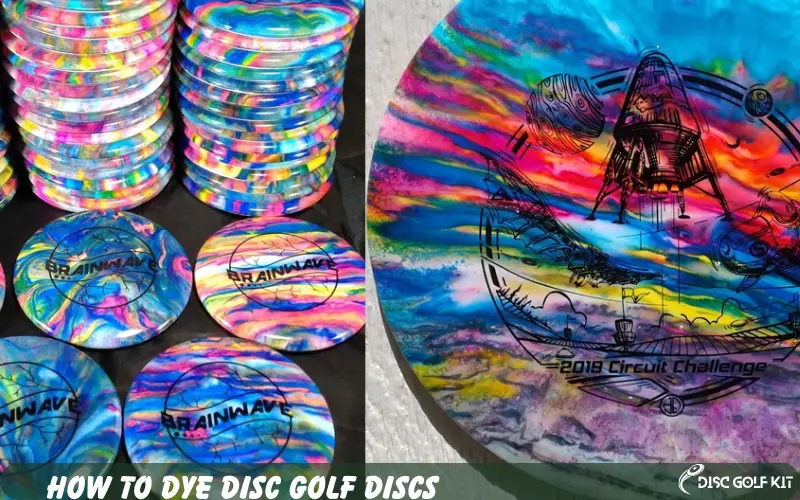
Playing disc golf with factory-made discs may get the job done, but it hardly expresses who you are as a player. It’s an everyday struggle—wanting to add a personal touch to your game but not knowing where to start. Dyeing disc golf discs can be a creative and fun way to personalize your equipment. You’ll need a blank, white disc made of premium plastic, such as Champion or Star plastic, to get started. First, thoroughly clean the disc with warm, soapy water to remove any oils or residues.
Next, choose your design and gather the necessary supplies, including dye, stencils, masking tape, and gloves. Mix your chosen dye colors in a well-ventilated area, ensuring you follow the manufacturer’s instructions. Apply the dye carefully to your disc using a brush or sponge, being mindful of your design’s placement. Use masking tape to protect areas you don’t want to dye. Allow the dye to set for the recommended time, usually a few hours, or overnight for more vibrant colors. Rinse the disc with cold water, remove the tape and stencils, and voilà, you have a custom-dyed disc golf disc ready to hit the course!
In this comprehensive guide on “How To Dye Disc Golf Discs,” we’ll cover all your bases from the why to the how, including a detailed step-by-step guide and list of materials; this article promises to be your one-stop resource for turning your drab disc golf discs into personalized masterpieces.
Why Dye Your Disc Golf Discs?
You’ve spent hours on the course, honed your techniques, and maybe even competed in a few tournaments. Your discs are more than just pieces of plastic; they are your loyal companions on the green. So why settle for generic, off-the-shelf colors and designs? Let’s explore why dyeing your disc golf discs can be a game-changer.
Personalization and Ownership
When you dye your discs, you make them uniquely yours. You get to decide the colors and patterns, imbuing each disc with a touch of your personality. This is especially useful in tournaments or busy courses where disc mix-ups occur. A customized disc is easily identifiable, reducing the chance of losing it among similar-looking discs.
Aesthetics and Style
Let’s be honest; playing with a bag of eye-catching custom discs adds excitement and joy to the game. The colors and designs can be coordinated to match your bag, your outfit, or even your mood. When your discs look good, you feel good; that positive energy can impact your game.
In summary, the benefits of dyeing disc golf discs extend beyond mere aesthetics. It’s about taking ownership of your gear, expressing your unique style, and enhancing your overall experience on the course. So, why customize your disc golf discs? Because your discs should be as unique as your throw.
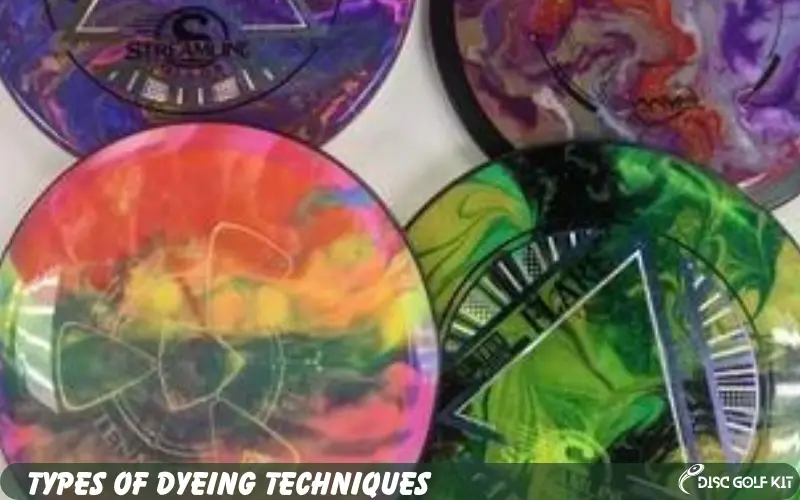
Types of Dyeing Techniques
There’s no shortage of techniques when adding a splash of color to your discs. Each method offers a distinct look, and the best part is that you can combine techniques to create intricate designs. This section will delve into the most popular disc golf dyeing techniques: shaving cream, spin, and stencil dyeing.
Shaving Cream Dyeing
Shaving cream dyeing is one of the simplest and most beginner-friendly ways to add color to your discs. In this method, shaving cream acts as a medium for the dye, creating a smooth, marbled effect on the disc’s surface. This technique is a great starting point if you’re new to dyeing disc golf discs.
Spin Dyeing
Spin dyeing offers a more dynamic and energetic pattern. As the name suggests, the disc is spun while the dye is applied, resulting in a whirlpool of colors and designs. This technique requires more setup and skill but offers a stunning payoff, especially if you want to create intricate patterns.
Stencil Dyeing
Stencil dyeing is for you if you have an eye for detail and enjoy working with designs and logos. This method uses cut-out stencils placed over the disc’s surface. The dye is then applied through the stencil, imprinting the chosen design on the disc. It’s a fantastic way to add specific shapes, logos, or text to your discs.
There are various methods for dyeing disc golf discs, each with unique advantages and style outcomes. Whether you’re a novice looking to experiment or a seasoned player interested in mastering advanced disc golf dyeing techniques, there’s a method that fits your needs.
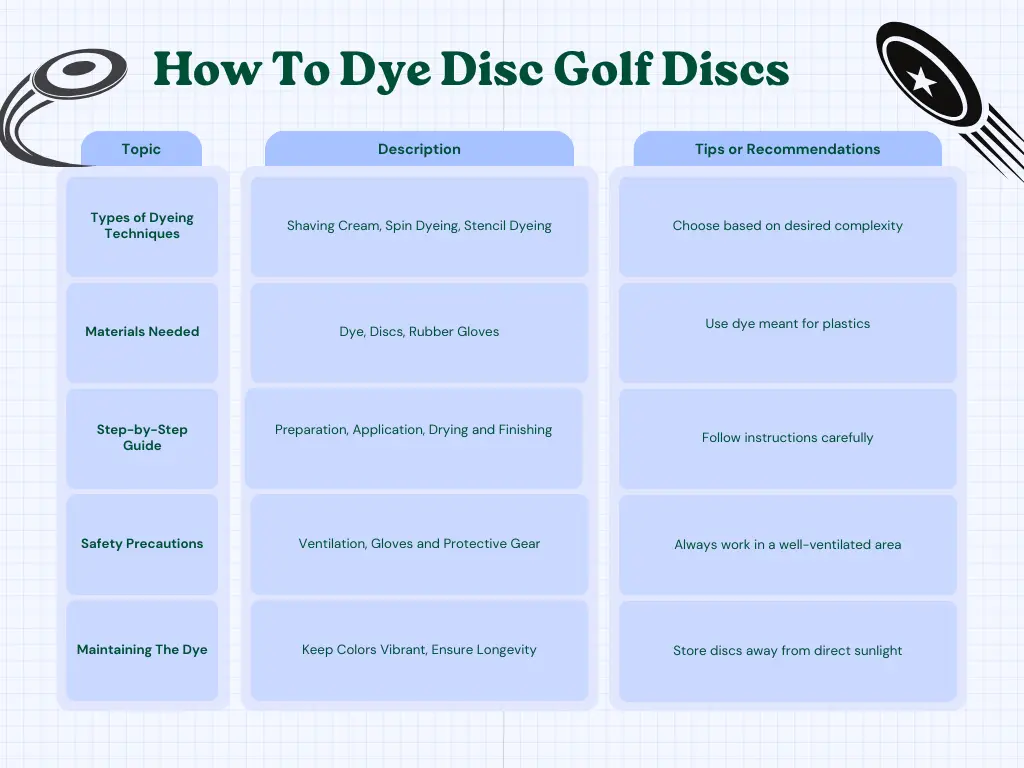
Materials Needed
Embarking on your disc dyeing journey requires more than just enthusiasm; you’ll need the right supplies to turn your creative visions into reality. Worry not, though, as most of these materials are available online or at your local craft and sporting goods stores. This section will cover what you’ll need to dye disc golf discs, ensuring you’re well-prepared for your artistic endeavor.
Dye
The first and most crucial item on your list is the dye itself. While various types of dyes are available, it’s crucial to opt for one specifically designed for plastics. Fabric dyes, for example, will not adhere well to your disc golf discs. Therefore, it’s recommended to use dyes made to bond with polymeric materials to ensure vibrant and long-lasting colors.
Discs
You’ll need the disc golf discs you wish to dye. It’s best to start with lighter-colored discs, as they’ll show off the dye more effectively than darker ones. White or light gray are often good choices for beginners. Considering the plastic type is also essential, as not all discs will hold dye equally well.
Other Essential Supplies
Gathering all the supplies for dyeing disc golf discs beforehand will set you up for a successful and hassle-free dyeing experience. You won’t find yourself halfway through the process, realizing you must remember an essential item.
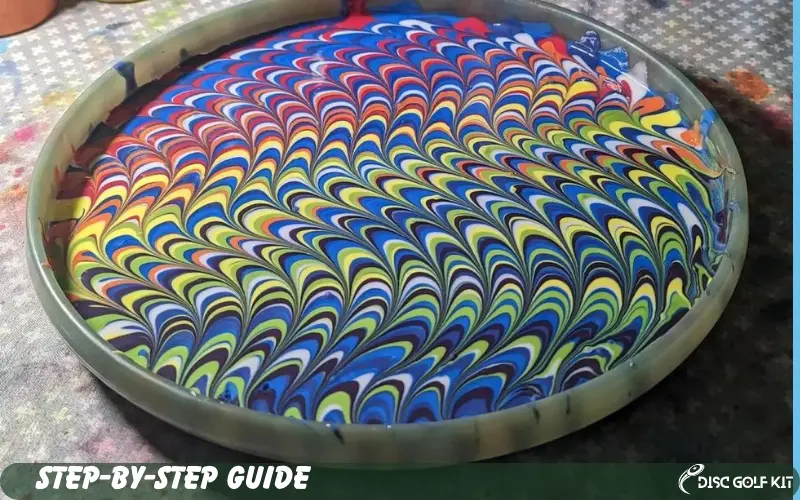
Step-by-Step Guide on How To Dye Disc Golf Discs
After gathering your materials and choosing your preferred dyeing technique, you’re ready to dive into the process. This step-by-step guide will walk you through how to dye disc golf discs, from preparation to the final finishing touches.
Preparation
For Shaving Cream Dyeing
For Spin Dyeing
For Stencil Dyeing
Drying and Finishing
There you have it—your complete steps for How To Dye Disc Golf Discs. Each dyeing method will have nuances, but this guide should give you a solid foundation on applying dye on disc golf discs, irrespective of the technique you choose.
Safety Precautions
Dyeing your disc golf discs can be incredibly rewarding and creative, but it also involves working with chemicals and dyes that can be harmful if not handled correctly. Therefore, understanding and following safety protocols is crucial. Below are some safety tips for dyeing disc golf discs to ensure that you not only end up with a beautiful custom disc but also keep yourself and your surroundings safe.
Ventilation
Whether you’re working indoors or outside, proper ventilation is a must. Fumes from certain dyes can be harmful if inhaled in large quantities. Make sure to work in a well-ventilated area; if indoors, open windows and use fans to circulate the air.
Gloves and Protective Gear
Rubber gloves are essential to protect your skin from coming into contact with the dye, which can cause irritation or staining. Depending on your dye, a mask, and goggles might also be recommended to protect your respiratory system and eyes from fumes or splashes.
In essence, dyeing your disc golf discs is not just an artistic endeavor but requires responsible handling and awareness of potential risks. Following these safety precautions ensures you know How To Dye Disc Golf Discs safely without compromising your well-being.
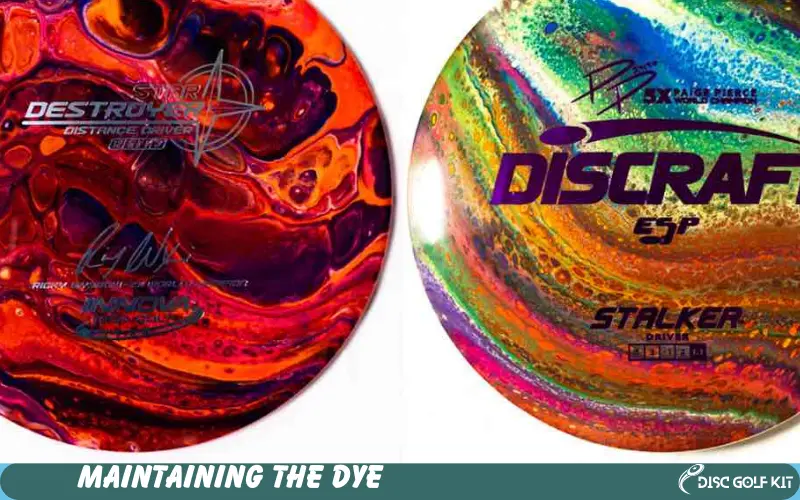
Maintaining The Dye
You’ve invested time, effort, and creativity into dyeing your disc golf discs. Naturally, you’ll want to keep them looking vibrant and fresh for as long as possible. While dyed discs are generally durable, there are some tips and best practices to maintain the vibrancy of your artwork. Here’s how to preserve dye on disc golf discs effectively.
How to Keep the Colors Vibrant
What to Avoid to Ensure the Dye Lasts Longer
Maintaining dyed disc golf discs is just as crucial as the dyeing process. With proper care, you can extend the life of your disc’s design, making each throw on the course a showcase of your creativity and style.
Conclusion
Customizing your disc golf discs is more than just a fun project; it expresses your personality, creativity, and gameplay strategy. From understanding why you might want to dye your discs to the different techniques you can use, we’ve covered all the ins and outs on how to dye disc golf discs. We’ve also touched upon the essential materials and the step-by-step guide to turning a blank disc into a piece of art. And remember the crucial safety tips and maintenance hacks to ensure your masterpiece stays vibrant for years to come.
If you’ve been playing disc golf with plain, unremarkable discs, there’s never been a better time to take your game and gear to the next level. Now that you’re armed with all the knowledge and tips, why not dive in and give your discs the makeover they deserve?
Thank you for reading, and if you found this guide helpful, be sure to share it with fellow disc golf enthusiasts looking to spice up their game. Happy dyeing!
Frequently Asked Questions

Written by
Declan Hodgson
Meet Declan Hodgson, your disc golf sherpa at DiscGolfKit.com. Navigating the twists and turns of the sport, I’m here to guide you through the world of discs, gear, and the pursuit of that perfect throw.